Category: How To Guides

List of simple tips and tricks of Smartphone, gadgets and browsers. These includes Tethering of smartphones, Enabling WiFi Hotspots, Browser optimisation, Tips and Tricks on Browsers etc.

  • How to use Moto G as modem to connect to PC

    Motorola Moto G is one of the best mid range smartphone. It is not as powerful as the most of the flagship smartphone in terms of the specification but in real time performance is outstanding for the price it is available. The price of Moto G is $179. The Moto G runs on Android Kitkat OS and powered by Dual core processor with 1GB of RAM. In this post let us see how to use the device as modem to connect to PC. This method of using Moto G tethering works with both the editions of Moto G.

    Read: moto g 2nd generation pros and cons & Pros and Cons of  Moto G .


    Motorola Moto G as modem

    How to use Motorola Moto G as modem to connect to PC

    To use Moto G as modem, you need to first enable the USB tethering. To do this follow the below steps.
    Step1:  Touch to the Apps.
    Step 2: Go to Settings.
    Step 3:  Tap on to More.
    Step 4:  Go to Tethering & Mobile Hotspot.
    Step 5:  Check the box for USB Tethering. Do note that, if you enabled WiFi or if USB cable is not connected, then USB tethering option will not be enabled.
    Once the tethering is enabled, Moto G works as a modem to use internet from PC. You can disable USB tethering by unchecking the tethering & Mobile Hotspot.
    Note:
    1. Moto G Tethering works with Windows Vista, Windows 7 and popular linux distributions such as Ubuntu, Fedora etc.

    2. Even you can also use Motorola Moto G as WiFi Hotspot to connect to any WiFi enabled devices using the Mobile Hotspot feature.

    How to use Moto G as WiFi Hotspot

    • Enable the mobile data on your Moto G.
    • Go to Settings->More–>Tethering & Mobile Hotspot
    • Check the Mobile Wi-Fi hotspot to enable WiFi Hotspot.

    Customising Moto G WiFi Hotspot Settings

    • Go to Settings->More–>Tethering & Mobile Hotspot
    • Tap to Set up Wi-Fi Hotspot.
    • Enter or Edit the Network SSID, Security Type and Password according to your wish.
    • Tap Save to save the settings.

    Moto G and Moto G 2nd Generation are the best priced well features smartphones available today. The timely Android upgrades, makes this device one of the most attractive phone to buy.

    Video Guide on How to Use Moto G as Wi-Fi Hotspot

  • Samsung Galaxy Note 3 Multi Window Tips

    We have seen multi window sidebar features in Galaxy Note 2,Galaxy S3, Galaxy Grand etc.  But with Galaxy Note 3, Samsung has introduced much improved and more feature rich Multi Window Feature.  In 5.7 inch full HD display, the Multi Window feature works flawlessly.  The previous models, one needed to change the screen constantly to suite the particular function we were using. But in the latest Samsung Galaxy Note 3, you can do two different tasks simultaneously such as looking up webpages while sending text in a single screen side by side.

    Multi Window Sidebar in Galaxy Note 3

    How to Use Multi Window Feature in Samsung Galaxy Note 3

    Activating muti window feature in Samsung Galaxy Note 3 is very easy.  Here is the quick steps which will useful for activating and using the multi window feature.

    Step 1:  In the home screen, swipe down from the top of the screen. This opens a quick settings bar.

    Step 2: Swipe to right till you get the Multi window icon. Tap on it to enable the Multi Window.

    Step 3: The left side middle of the screen you will find a arrow mark.

    Step 4: Drag the application in the Multi window sidebar to the main window.

    Step 5: Drag the another application which you want to work along with the first opened app.

    Step 6:  You can adjust the size of the windows by moving the split bar handle.

    Step 7: Thats it. Start working on the both the applications at time.

    How to Disable Multi windows Side bar in Samsung Galaxy Note 3

    Follow the same steps 1 & 2 given above. As you know, when you first tap it, it will enable and if you tap it twice it will get disabled.

    Creating Paired windows

    As  mentioned earlier, muti window feature of Samsung Galaxy Note 3, you work with two apps at time. If you are using two apps always together, then you can use this feature. Using the Paired windows feature, you create a single to open two apps at a time with single tap.

    Step1:  When you have two apps open, Tap arrow key from the left of the screen.

    Step2: Tap on to see more option

    Step 3: Tap the create button.  New pop us comes up.

    Step 4: Enter the name  you want to give it to the paired window.

    Step 5: Tap Ok. Paired windows is created.

  • Samsung Galaxy S4 Tips And Tricks

    Samsung Galaxy S4 is the flagship smartphone with powerful processor and beautiful design. Once you have such a powerful smartphone, you are eager to know what you can do with that and how to do it. So in this post, I will show you some of the Samsung Galaxy S4 tips and tricks.

    Samsung Galaxy S4 Tips and Tricks

    1. Swiping down with two fingers to get the access to Quick Setting Panel: To use this feature, just swipe down from the status bar with two fingers. Then touch and hold to access settings. You can rearrange icons by long tapping and icon and drag it to required place.
    2. Adding TV Remote control to notification panel for quick access:  Go to Application screen and then Watch On and then Settings.
    3. Setting WiFi Timer: Using this feature, you can save cellular data, as the phone will try to connect to available Wi-Fi networks for a specific period of time.  You can enable this by Setting->Connection->WiFi->Advanced->Wi-Fi Timer.

    Samsung Galaxy S4 Tips And Tricks

    4. Taking screen Shot or Print screen on Samsung Galaxy S4: You can take screen shot or print screen on Galaxy S4 by two ways. One is default android way and another is new hand swipe feature.
    To take screenshot on normal way, just press Volume down+Menu key at time. The screen shot will get saved in the gallary. Another way is by Hand swipe.  To take screen shot by hand swipe, just go to Settings->Motion. Scroll down and find Hand Motion. Then Palm Swipe to Capture. Enable that by ticking the check box. Now close the menu and shape your hand like you are “Chopping” the screen. Set your hand on either side of the screen. Then horizontally swipe across it. You can move it either way. There is no restriction on it. If you have done it correctly, then you will hear camera shutter and recieve a notification that a picture has been saved to the gallery.
    5. Samsung Galaxy S4 Tethering: Tethering of Samsung Galaxy S4 is very easy. You can easily use Galaxy S4 as modem to connect to internet from PC using USB tethering or through WiFi Hotspot. I have written detailed post on this in Tethering of Samsung Galaxy phones.
    6. Downloading mobile PC suite for Samsung Galaxy S4: Like any other Galaxy devices, Samsung Galaxy S4 too supports PC suite Samsung Kies desktop application and Kies Air mobile app. You can refer my on earlier How to download free Mobile PC suite for Samsung Mobiles for download instruction.

    Hope these Samsung Galaxy S4 tips and tricks helps. Share your feedback in the comment section below.

  • Update Sony Xperia Z Ultra to Latest Firmware

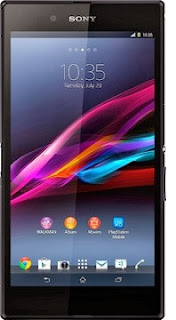
    As we all know, Sony has starting seeding firmware updates to its Xperia Ultra smartphones which brings new features such as Mobile X-reality engine, and few improvements to enhance the user experience. Sony Xperia Z Ultra has 6.4 inch Full HD display screen and powered by 2.2GHz Quad Core Qualcomm Snapdragon 800 processor with 2GB of RAM. The internal storage of the device is 16GB and it supports microSD card upto 64GB.

    Update Sony Xperia Z Ultra Tips and Tricks
    Sony Xperia Z Ultra

    Coming back to the firmware update Sony Xperia Z Ultra,  the last update which was named as 14.1.B.510. It is one of the major update from the Sony. The new Xperia Ultra Update brings support for Sony’s mobile X-Reality engine which promises to increase the overall playback quality of locally stored media files such as photos, movies by adjusting the sharpness, saturation, contrast, noise reduction and even reproduction of lacking pixels. There many more new features and improvements also comes along with the update. Below are the few of them. The total size of this major update is 770MB.

    • Overall performance increase and improvements in battery life.
    • New stock widgets – Clock, Alarm Clock and Calculator among others.
    • Multiple small apps can now be opened at once.
    • Refreshed design as far as the messenger and e-mail apps are concerned.
    • Superior Auto mode added to the camera appearance.
    • One-handed text input now possible.
    • Background UI has gone white-grey.

    How to Update Sony Xperia Z Ultra Smartphone to Latest Firmware

    1. You need to download and install the Sony Xperia PC Companion PC suite.
    2. Connect yout device to PC using the USB cable. Ensure that your phone is charged at least 75%.
    3. If there is update you will get a notification. Click on that. Continue to follow the on screen instructions to complete download and installation.
    Note: If update is smalll in size, you can update your Sony Xperia smartphone through Over The Air(OTA) feature too.
  • How to Use Samsung Galaxy Phone as modem to connect to Internet from PC

    Samsung has wide range of Galaxy smartphones such as Galaxy Star, Galaxy J Series, Galaxy On Series, Galaxy A series, Galaxy M Series and flagship Galaxy S series and Galaxy Note series. All these phones are running on Android operating system.

    All the Android smartphones running on Gingerbread or later versions support USB tethering and WiFi tethering feature. WiFi Tethering is nothing but sharing the internet connection with other WiFi enabled devices such as tablets, laptop etc. Similarly USB tethering is sharing the internet connection through USB cable. There is also Bluetooth tethering option.

    You may like to read:

    In this post, I will show you how to use Samsung Galaxy Smartphones as modem through USB tethering as well as through WiFi tethering. This method of using the internet from PC through smartphone works on all the Samsung smartphones running on Android OS such as Galaxy Note 3, Galaxy S4, Galaxy S3, Galaxy S4 mini, Galaxy S3 Mini, Galaxy S advance, Galaxy S duos, Galaxy S Duos 2, Galaxy Y, Galaxy Y duos, Galaxy Core, Galaxy Quattro, Galaxy S2, Galaxy S5, Galaxy Grand Prime, Galaxy Alpha, Galaxy J5 etc to name few. Let is start learning on how to use tethering on Samsung Galaxy Phones.

    Use Samsung Galaxy Phone as modem

    Use Samsung Galaxy Smartphones as WiFi Hotspot

    As said earlier, Samsung mobiles can be used as modem to connect to internet from PC with WiFi adaptor or WiFi enabled devices. To make to use Samsung mobiles as wireless modem please follow the steps given below.

    1. To start with, enable the data connectivity on your phone by Going to setup->More Settings->Mobile Networks and enable Use Packet Data. Do note that, the internet charges from your network provider will be applies.
    2. Now goto  setup->More Settings once again. Tap on to Tethering and Portable hotspot.
    3. Move slider to right next to Portable Wi-Fi hotspot. This enable the WiFi hotspot on your Samsung Device.
    4. Tap on  Portable Wi-Fi hotspot  to configure the Network SSID and password for your WiFI hotspot.
    5. Now your device WiFi network will be accessible from the other WiFi enabled devices using the Network SSID and password you have chosen.

    Use Samsung Galaxy Smartphones as Modem using USB tethering

    For using Samsung mobiles as modem, you need to install Samsung  Drivers on your PC. Samsung does not provides standalone Driver for mobile. However, you need to install Samsung Kies PC suite to get the required Samsung Drivers. I have already written a post on the same. You can read that for that  from How to download free Samsung Kies PC suite.

    1. Once you have installed Samsung Kies, Connect the Samsung mobile to PC via USB cable. It will take few seconds to install and configure the required drivers for your device.
    2. Once it is done, follow the 1 and 2 steps mentioned above
    3. Enable USB tethering by selecting the check box.
    4. Now you will be able to access internet from your PC using your smartphone as modem.

    These are some of the ways to share smartphone internet with other devices such as Tablets, laptop etc.