Author: Aniruddh

  • How to take Screenshot on Moto G Turbo

    Motorola has finally launched Moto G Turbo in India with price tag of Rs.14,499.  It is slightly improved version of Moto G3. In this post we will learn how to capture screen or perform print screen on Moto G Turbo.

    How to take screenshot on Moto G Turbo

    How to take screenshot on Motorola Moto G Turbo

    Taking screenshot on Moto G turbo is similar to the Moto G3 and other Motorola smartphones. Capturing screenshot is useful in many occasion. For example if you want to share Whatsapp chat session or game high score or Facebook timeline etc with your friends, then print screen comes in very handy.

    To take the screenshot on Moto G Turbo follow steps mentioned below.

    • First go to the screen or app which you want capture as screenshot.
    • Press and hold volume down and power key simultaneously.
    • The screen will flickr and shutter sound will be heard which confirms that, Moto G turbo successfully captured screenshot.
    • The taken screenshot will be saved in Gallery folder.

    As mentioned before, Moto G Turbo is a minor upgraded version of Moto G 3rd generation. The design, display, water and dust resistance, Android version, camera remained same. Soc is upgrade to 64 bit 1.5GHz Octa Core Snapdragon 615 SoC  with 2GB of RAM. Now it has Adreno 405 GPU which is believed to  provide better gaming experience.

    Moto G Turbo features 13MP primary camera and 5MP front facing camera. With initial impression, it feels like the same camera unit we have seen in Motorola Moto G3. Along with 16GB of on board storage, it has support for microSD card and USB OTG.

    Moto G Turbo has 2470 mAh battery which turbo charging feature. Good thing is that, the bundled charger supports Turbo charging. Exactly, how fast it charges and how the battery life on Moto G Turbo will be shared once I complete my review.

    Hope this guide on Motorola Moto G Turbo is helpful. If you like ask any question on this device, then please share it in the comment section below.

  • Take Screenshot on Samsung Galaxy J5, J7 and J2

    Taking a screenshot on Galaxy J5, Galaxy J7 and Galaxy J2 is very simple and easy. All these smartphones share the same procedure. Performing print screen on Samsung Galaxy J series smartphone is useful if you would like to share your high score in a game or making a tutorial or saving a receipt of payment etc. Here are the tips to take a screenshot on Samsung Galaxy J5, J7 and J2.

    Whatever may the reason for capturing a screenshot on Galaxy J smartphone, it always good to know this feature. So here is the step by step tutorial on how to take a screenshot on Galaxy J5, Galaxy J7, Galaxy J3, Galaxy On5, Galaxy On7, Galaxy J5 2016 and Galaxy J7 2016.

    Other Related Tips:

    How to take a screenshot on Galaxy J5, J7 and J2

    This is most of common way to take a screenshot in Galaxy J5 and Galaxy J7.

    • First, go the screen on which you want to take a screenshot.
    • Now press and hold Power and the Home key simultaneously. In my experience, I felt the power key should press fraction of a seconds before home key. If it is not simultaneous then screenshot can not be taken.
    • The screen will Flicker and a shutter sound will be heard. This confirms that the screenshot is taken.

    How to access taken screenshot on Galaxy J7, J5 and J2

    • You can access taken screenshot from the notification area if you have just taken a screenshot or you have not cleared the notification area after taking the screenshot.
    • Another way to access the taken a screenshot is from the Gallery folder.

    Samsung Galaxy J2, J5 and J7 all share a few common features such as AMOLED display screen and Android 5.1.1 with Touchwiz UI. The screen size, screen resolution and internal hardware are different.

    Video guide on how to take screenshot on Galaxy J5, J7 and J2

    This video covers the topic on take Screenshot on Samsung Galaxy J5. However, you can use this method to take a screenshot in other Samsung Galaxy J series smartphones.

    Take screenshot in Galaxy J5 , J7 and J2

    Samsung Galaxy J5, J7 and J2 are budget Android smartphones. So Samsung has trimmed many features on these devices. For example, Palm swipe method of taking a screenshot is not available on this device.  Without installing any third-party apps, if you want to print screen on these Samsung Galaxy J smartphones, then there is only one method is available as of now.

  • How to Open Recently Closed tab in Google Chrome Browser

    Google Chrome is one of the most popular browser. When we use the browser, sometimes we open multiple tabs. At times while doing so we might accidentally end up in closing tab which we needed it. So is there any way to reopen just closed tab in chrome? Yes. There is a straight and very simple way to restore previously closed tab to reopen in Chrome browser.

    How to Reopen Closed Tab in Google Chrome browser

    There are two ways through which you can restore the previously closed tabs in Chrome. These are built in features. If you want to save and reopen entire tab sessions, then you need to use third party extensions such as Session manager, Session buddy etc.

    Method 1: To reopen recently closed tab in chrome, right click on any empty space on tab bar. You will get a new menu pop up. Select ” Reopen closed tab”. If you repeat this, it reopen previous to previous tab.  Alternatively, you can also use Ctrl + Shift + T keyboard shortcut to reopen the tabs.

    Re open recently closed Tab

    Method 2: Go to menu(right most side of address bar). There find the “History”. Under history, it shows  previously closed tabs and windows. Other ways of accessing History is through  typing “chrome://history/” in the address bar or using the keyboard shortcut “Ctrl+H“.

    How to open previously closed tab when starting Chrome

    Open google chrome browser. Go to menu which is there in the right most side of address bar. Now go to “Settings“. Under ‘On startup‘ select “Continue where you left off” . Save the settings. This enables, whenever you open chrome browser, it open last closed tab. This will be useful if you are reading some post and if you would like to continue reading after sometime.

    Reopen previosuly closed tab when starting chrome

    Recovering tab when Chrome browser crash

    Some time while using the chrome browser, it crashes. Recovering the tabs in this scenario is very simple. Once again open the chrome browser. There will be pop which prompts you whether you would like to restore the previous session. Click Restore. It will open all the tabs which were open when chrome crashed.

  • Asus Zenfone Laser with 6 inch Full HD display launched at Rs 17,999

    Asus has launched new variant of Zenfone 2 Laser(ZE601KL) in India at a price of Rs.17,999. The device will be available in 3 different color options – Red, Silver and Gold. Starting December 2nd week, ZenFone 2 Laser (ZE601KL) will be available through popular e-commerce sites such as Amazon, Flipkart and Snapdeal. It can be also purchased from offline channels.

    Asus Zenfone 2 Laser(ZE601KL) sports 6-inch IPS full-HD display with a 1080 x 1920 pixel resolution and 367 ppi pixel density. The display has scratch resistant Corning Gorilla Glass 4 protection.  ZenFone 2 Laser (ZE601KL) is a dual sim 4G enabled smartphone and runs on Android Android 5.0 Lollipop-based ZenUI. It includes all Asus Zenfone software customization such as What’s Next, ZenLink, ZenMotion, Quick Access, ASUS Splendid, Kids Mode, Snap View, One Hand Mode, Trend Micro Security, Themes and more.

    Recommended Reading:

    How to take screenshot on Asus Zenfone 2 Laser

    How to use Asus Zenfone 2 Laser as modem

    Asus Zenfone 2 Laser(ZE601KL) is powered by 64-bit octa-core Qualcomm Snapdragon 616 (MSM8939)  Soc coupled with 3GB of RAM. The device has 16GB of inbuilt storage and supports microSD card upto 128GB. The connectivity options available on this device includes Bluetooth, Wi-Fi, GPS/ A-GPS, Glonass, GPRS/ EDGE, 3G,Micro-USB, USB tethering and WiFi Hotspot. Zenfone 2 Laser(ZE601KL) also supports Indian 4G LTE bands. As per the company, the device supports upto 150Mbps of download speed.

    Asus Zenfone 2 Laser

    Asus Zenfone 2 Laser(ZE601KL) has 13MP rear camera with large f/2.0-aperture and 0.03 seconds auto-focus feature. This is said to enable up to two times faster focus and zero shutter lag. The camera performance enhancing features such as ASUS PixelEnhancing and PixelMaster technology which allows users to take up to 400 percent brighter photos and videos also available. For selfie lovers, there is a 5MP secondary camera in the front.

    Asus Zenfone 2 Laser(ZE601KL) measures 164.5x84x10.5mm and weighs 190 grams. The device has 3000mAh Li-Polymer battery. The sensors in the device are accelerometer, e-compass, gyroscope, proximity light, and ambient light.

    With addition of this variant, Asus has 3 differently priced Zenfone 2 Laser smartphone variants. Asus Zenfone 2 Laser ZE550KL is most affordable variant which priced at Rs.9,999. Another variant is Asus Zenfone 2 Laser 5.5 which is priced at Rs.12,999. Asus has recently launched Asus ZenFone Zoom With 3X Optical Zoom in Taiwan which will hit the stores starting mid-December in Taiwan.

  • How to take screenshot on OnePlus X

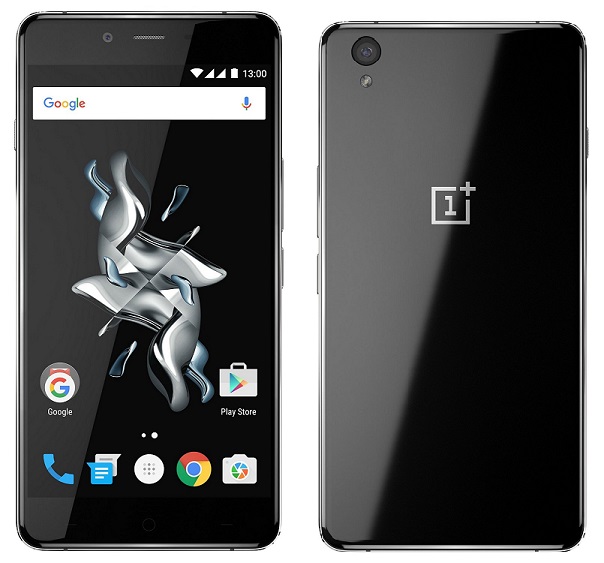
    OnePlus X is considered to be a very good mid-range Android smartphone. It has decent power, elegant look, and an attractive price tag. I already made a post on OnePlus X review which talks about pros and cons of the device. In this post, we will learn one tip on this device. That is how to do the print screen or screen capture on the OnePlus X.

    OnePlus X Dual sim
    OnePlus X

    How to take screenshot on OnePlus X

    OnePlus X runs on Oxygen OS based on Android 5.1. So there are two ways through which you can do the print screen on OnePlus X. The first method is through the default android method or Volume Down Plus Power key method. The second one is using the power menu option. This method of screen capture on OnePlus X does not need any third party apps. It works with default apps and settings.

    How to take screenshot on OnePlus X using Power Button and Volume Down Button or Default Android Method

    This is the most common method of taking a screenshot. Most of the Android smartphones support this method of taking the screenshot and OnePlus X is not an exception. So let’s explore this method of taking screenshot.

    • Go to the screen or App on which you want to take a screenshot.
    • Press and hold volume down and power button simultaneously.
    • The screen will flickr and shutter sound will be heard.
    • The screenshot will be saved in Gallery->Screenshot folder.

    How to take screenshot on OnePlus X using the Power Menu option

    Comparing with the above method, this is the easiest way of taking a screenshot on OnePlus X.

    • Go to the screen or App on which you want to take screenshot.
    • Long press on Power button.
    • You will get a power menu.
    • Tap on to the “Screenshot” Options.
    • It will take the screenshot.
    • The taken screenshot will be saved in Gallery->Screenshot folder.

    Hope this guide on how to take screenshot on OnePlus X is useful. If you face any issues or anything you want to share use comment section below. Also, share any other useful tips you have got with OnePlus X.