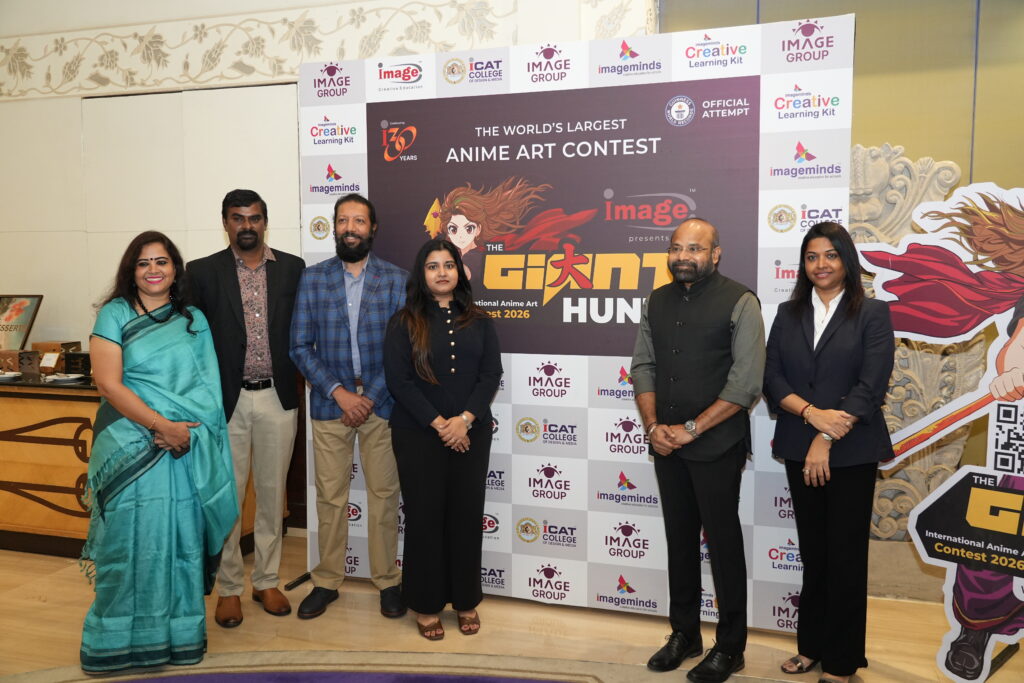
Looking for the best ways to quickly capture your screen on the new iPhone 17 or iPhone 17 Pro? 🤔 You’ve come to the right place!
While the traditional button method is reliable, your new iPhone offers a couple of incredibly convenient alternatives you might not know about. In this quick guide, we’ll walk you through three simple and effective methods for taking a screenshot on your latest iPhone model.
Here are the three ways you can take a screenshot on the iPhone 17/17 Pro:
Method 1: The Classic Hardware Button Combo
This is the most well-known and fastest method, using your iPhone’s physical buttons.
Locate the Buttons: Find the Volume Up button (on the right side) and the Side button (on the left side) of your iPhone.
Press Simultaneously: Quickly press both buttons together and then release them.
Review the Capture: A small preview of the screenshot will appear in the bottom-left corner. You can tap it to crop, edit, or just wait a moment for it to save automatically to your Photos app.
Method 2: The Magic of Back Tap (One-Time Setup Required)
The Back Tap feature is a hidden gem in the Accessibility settings that lets you assign a shortcut (like taking a screenshot) to a simple double-tap on the back of your phone.
One-Time Setup:
Go to Settings.
Scroll down and tap Accessibility.
Go inside Touch.
Scroll down to the bottom and tap Back Tap.
Select Double Tap (or Triple Tap, if you prefer).
From the list of actions, scroll down and select “Screenshot.”
Future Use:
Once set up, simply double-tap the very back of your iPhone 17 (even with a case on!) to instantly capture the screen. No need to fumble for buttons!
Method 3: The Easiest Way – Just Ask Siri!
For a completely hands-free method, you can simply ask your digital assistant to do the work.
Launch Siri: Activate Siri using the “Hey Siri” command or by pressing and holding the Side button.
Give the Command: Say, “Screenshot.“
Siri will instantly capture the image and save it to your Photos app. This is the easiest method if your hands are full or you prefer voice commands.
Whether you prefer the traditional button combo, the super-convenient “Back Tap” feature, or simply asking Siri, your iPhone 17/17 Pro gives you plenty of options for capturing those important moments on your screen.
We hope this quick tutorial was helpful! For more tips and tricks on getting the most out of your new device, keep an eye on our latest guides!
Tired of the default “Radar” chime? Your iPhone 17 (or 17 Pro) offers easy ways to personalize its sounds. Whether you want to pick a different classic tone or use your favorite song, we’ll walk you through the steps.
Want to turn off your iPhone 17 Pro? Whether you prefer using the physical buttons or navigating through the software, we’ve got you covered with two simple methods.
How to turn off iPhone 17 and iPhone 17 Pro
Method 1: Using the Hardware Buttons
Locate the Keys: Find the volume keys (Volume Up/Down) on the left side and the Side button (also known as the power button) on the right side of your iPhone.
Press and Hold: Simultaneously press and hold the Side button and either the Volume Up or Volume Down button.
Slide to Power Off: The Power Off menu will appear on your screen. To switch off the phone, simply slide the “power” icon to the right.
To Turn It Back On:
Press and hold the Side button until the Apple logo appears on the screen. Give it a moment to complete the boot-up process.
Method 2: Without Hardware Buttons (Software Method)
If your buttons are hard to reach or you simply prefer a software-based approach, you can turn off your iPhone 17 Pro right from the screen:
Open Control Center:Swipe down from the top right corner of your screen to open the Control Center.
Access Power Menu: Look near the top of the screen; you’ll find a small power icon . Tap and hold this icon.
Slide to Power Off: The familiar Power Off menu will appear. Slide the power icon to the right to shut down your phone.
To Turn It Back On:
To power on your iPhone without using the buttons, simply connect your charger to the phone. The Apple logo will appear, and your device will boot up automatically, taking you to your lock screen in a few seconds.
Want to know the quickest and easiest ways to turn off Samsung Galaxy Z Fold 7? Look no further! This guide will walk you through three simple methods to shut down your device, and even give you a tip for what to do if it freezes. Master your Z Fold 7’s power options now!
How to Turn off Samsung Galaxy Z Fold 7
Method 1: The Classic Button Combination (Quickest Way to Power Off)
For a quick and intuitive shutdown, the tried-and-true button combination is your go-to. This method is familiar to many Android users and is often the fastest way to access the power menu.
Here’s how to do it:
Locate the buttons: Find the Volume Down button and the Power button (also known as the Side key) on your Samsung Galaxy Z Fold 7.
Press simultaneously: Press and hold both the Volume Down and Power buttons at the same time for about a second.
Access the Power Menu: The power menu will instantly appear on your screen, offering options like “Power off,” “Restart,” and “Emergency call.”
Confirm Shutdown: Simply tap “Power off” and then confirm your choice to shut down your Z Fold 7.
This method is quick, efficient, and perfect for a standard shutdown.
Method 2: Accessing the Power Menu via the Quick Panel
Did you know you can also access the power menu directly from your Quick Panel? This method is super convenient if you’re already navigating your phone and don’t want to fumble with buttons.
Follow these steps:
Swipe Down from the Top-Right: From your Samsung Galaxy Z Fold 7’s screen, swipe down from the top-right corner. This action will reveal your Quick Panel, which contains various settings toggles and notifications.
Locate the Power Icon: In the Quick Panel, you’ll notice a distinct power icon (often a circle with a vertical line through it) typically located near the top.
Tap the Power Icon: Tap on this power icon.
Open Power Menu: The familiar power menu will pop up on your screen, allowing you to easily select “Power off” or other options.
This method offers a touch-friendly alternative to the button combination.
Method 3: Remap the Side Key for Direct Power Off Access
By default, long-pressing the Side key on your Galaxy Z Fold 7 might launch Google Assistant (or Gemini, depending on your settings). However, Samsung gives you the flexibility to customize this! You can remap the Side key to directly bring up the power menu, making power-off even more convenient.
Here’s how to customize your Side key:
Open Quick Panel: Swipe down from the top-right corner of your screen to open the Quick Panel.
Tap Power Icon: Tap the power icon within the Quick Panel.
Go to Side Button Settings: From the power menu that appears, choose “Side button settings.”
Change Long Press Action: Under the “Long press” section, you’ll see options for what happens when you long-press the Side key. Change the selection from “Google Assistant” (or “Gemini”) to “Power off menu.”
Now, with this setting changed, a simple long-press of your Side key will directly bring up the power menu, streamlining your shutdown process even further!
Bonus Tip: How to Force Restart Samsung Galaxy Z Fold 7
It happens to the best of us: sometimes, your phone just freezes and becomes unresponsive. Don’t panic! Your Galaxy Z Fold 7 has a built-in force restart mechanism that can often resolve minor software glitches.
To force restart a frozen Z Fold 7:
Press and Hold Both Buttons: Simultaneously press and hold both the Power button and the Volume Down button.
Keep Holding (Ignore Power Menu): It’s crucial to keep holding both buttons. You might see the regular power menu appear – ignore it.
Wait for Screen to Go Blank: Continue to hold the buttons until your screen goes completely blank and your phone vibrates, indicating it’s restarting. This can take about 10-15 seconds.
This action performs a hard reset, often clearing temporary software hiccups and getting your phone back to normal.
Conclusion
Knowing these different methods to power off your Samsung Galaxy Z Fold 7 provides you with flexibility and control over your device. Whether you prefer the quick button combo, the convenience of the Quick Panel, or a remapped Side key, you’re now equipped to manage your phone’s power settings like a pro. And remember that handy force restart tip for those unexpected freezes!
If you found this guide on powering off your Galaxy Z Fold 7 helpful, please like this post and share it with others who might benefit!
The Samsung Galaxy Z Fold 7 is a technological marvel, and getting the most out of it means diving into its versatile settings. This guide will walk you through eight essential tips to optimize your new foldable, from customizing your displays to enhancing your video quality.
Samsung Galaxy Z Fold 7: First 8 settings to change
1. Separate Your Screens for Personalized Control
By default, your Galaxy Z Fold 7 mirrors content between its large inner display and the smaller cover screen. While convenient, true optimization comes from separating these displays. This allows you to create unique home screen layouts tailored to each screen’s use case.
To gain independent control:
Long-press on your home screen.
Tap Settings.
Locate and tap Cover screen mirroring.
Toggle the setting from ‘On’ to ‘Off’ and tap ‘Apply’.
Now, you can design a widget-rich layout on your main screen for productivity and a clean, minimalist setup on your cover screen for quick access to essentials.
2. Embrace Gesture Navigation for Maximum Screen Real Estate
The Galaxy Z Fold 7 boasts an expansive display, and a persistent navigation bar can intrude on that precious screen space. Switching to gesture navigation provides a more immersive and futuristic experience.
To make the switch:
Go to Settings.
Tap Display.
Scroll down and select Navigation Bar.
Change the default ‘Buttons’ to ‘Swipe gestures’.
This simple change frees up significant screen real estate and makes navigating your Z Fold 7 feel even more fluid.
3. Customize Your Taskbar for Seamless Multitasking
The taskbar on your Z Fold 7 is a powerful tool for multitasking. By default, it might auto-hide when using gestures, but you can configure it to be a permanent fixture, keeping your favorite apps always within reach.
To customize your taskbar:
Navigate back to Display settings.
Tap Taskbar.
Under ‘Taskbar style’, change ‘Auto hide when apps are opened’ to ‘Stay on screen’.
While you’re here, you can also adjust how many recent or suggested apps appear on the taskbar, or even disable this feature entirely, allowing for a truly personalized control center.
4. Optimize App Continuity for a Smooth Foldable Experience
One of the standout features of a foldable phone is the seamless continuity of apps as you open and close the device. Optimizing the ‘Continue apps on cover screen’ feature ensures a fluid transition tailored to your preferences.
Access these options in Display settings under ‘Continue apps on cover screen’:
‘Always’: The app instantly transitions to the outer screen.
‘Swipe up to continue’: This offers more control, preventing accidental launches but keeping the app readily available with a quick swipe.
‘None’: Completely disables the continuity feature.
For a balanced experience, ‘Swipe up to continue’ is often recommended, giving you both control and convenience.
5. Force Flex Mode on Any App
Flex Mode transforms your Z Fold 7 into a versatile workstation or entertainment hub. While many apps automatically support it, you can manually enable Flex Mode for any application, unlocking new possibilities.
To force Flex Mode:
From your main Settings, scroll down to Advanced features.
Tap Flex mode panel.
Simply toggle on the switch for any app you wish to use in Flex Mode.
Once enabled, open the app and partially fold your phone. If it doesn’t automatically adjust, a small icon on the bottom left of the screen will appear, allowing you to manually activate Flex Mode.
6. Revert to the Classic Notification Shade
Samsung’s recent changes to the notification shade separate quick panel and notification access. If you prefer the classic ‘one swipe does it all’ method, you can easily revert to it.
To get the combined view:
Swipe down from the top of your screen.
Tap the small pencil icon.
Go to Panel settings.
Change the option from ‘Separate’ to ‘Together’.
Now, a single swipe down from anywhere on the top will provide the classic combined view, and another swipe down will reveal the full quick panel.
7. Alphabetize Your App Drawer for Easy Navigation
As your app collection grows, finding specific applications can become a tedious task. A simple yet highly effective quality-of-life improvement is to sort your app drawer alphabetically.
To quickly organize your apps:
Open your app drawer.
Tap the three vertical dots in the bottom right corner.
Select ‘Sort’.
Choose ‘Alphabetical’.
This straightforward change will make navigating your apps significantly faster and more intuitive.
8. Utilize Audio Eraser for Crystal-Clear Videos
For content creators and those who cherish clear memories, the Z Fold 7’s new audio eraser feature is a game-changer. It’s perfect for removing unwanted background noise from your videos, ensuring your memories sound as good as they look.
To use the Audio Eraser:
Open a video in your Gallery app.
Tap the optimize button (often represented by a magic wand or similar icon) .
Allow the phone to process the audio.
You can then tap ‘Auto’ to let the AI intelligently clean up the sound, or manually adjust the levels for fine-tuned control.
This powerful tool helps you capture and preserve high-quality audio in all your video recordings.
These eight essential tips will help you unlock the full potential of your new Samsung Galaxy Z Fold 7. By customizing these settings, you’ll create a personalized and optimized experience that truly makes the most of this incredible foldable device.
What’s your favorite new feature or tip for the Galaxy Z Fold 7? Share your thoughts in the comments below!