Twitter recently added a new feature to its iOS app. The feature we are talking here is about the option to share Live Photos as GIF. Earlier, twitter iOS app had the option to edit the image which they want to tweet. Now user can convert live photos into GIF. So in this post, let us have a quick look into how to share live photos as GIF in twitter from iPhone.
This new feature allows you to record short videos and upload them as GIFs via your iPhone. However, this feature is not yet added to twitter android app.
You may like to read:
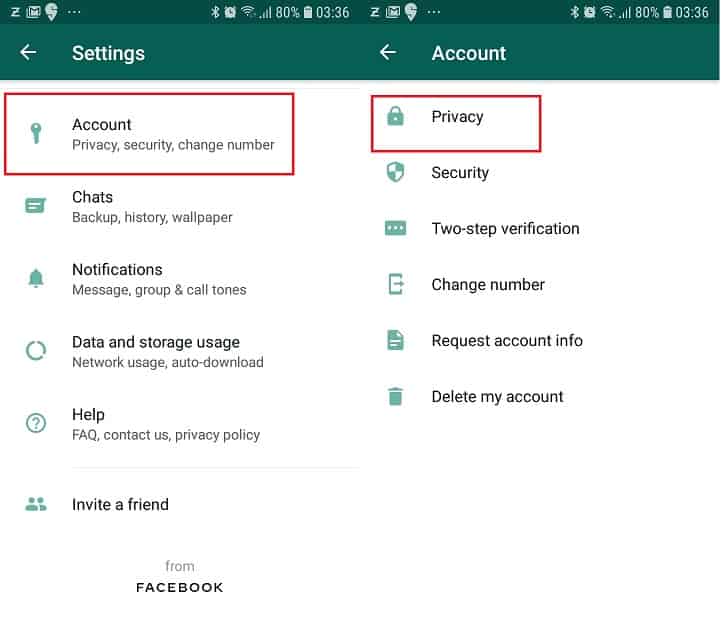
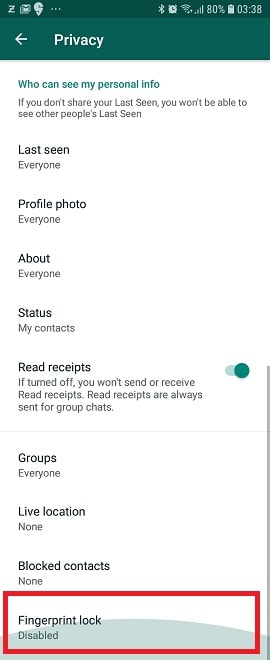
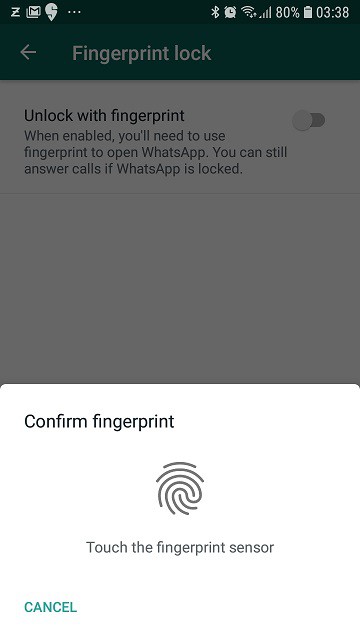
- How to add fingerprint lock to WhatsApp.
- Stop unknown people adding you to groups in Whatsapp.
- Download status video and photos in WhatsApp.
How to share Live Photos as GIF in Twitter from iPhone
- Tap on the new tweet.
- Select photos option. Now you can select Live photos.
- Choosing Live photos instead of all photos will help to select live photos.
- Tap Add.
- Now tap on “GIF” option at the bottom left corner of the live photo. Initially, there will be a cross line on the “GIF” option. Upon tapping, the cross-line will go off.
- Now you can share the tweet. The live photo will be shared as GIF.
There are many iPhone users already started using this feature. If you have share-worthy live photos, it is the time to try out this new feature. If you are an android user, you may need to wait for some time. However, you can use third-party apps to convert live photos and GIF in Android.